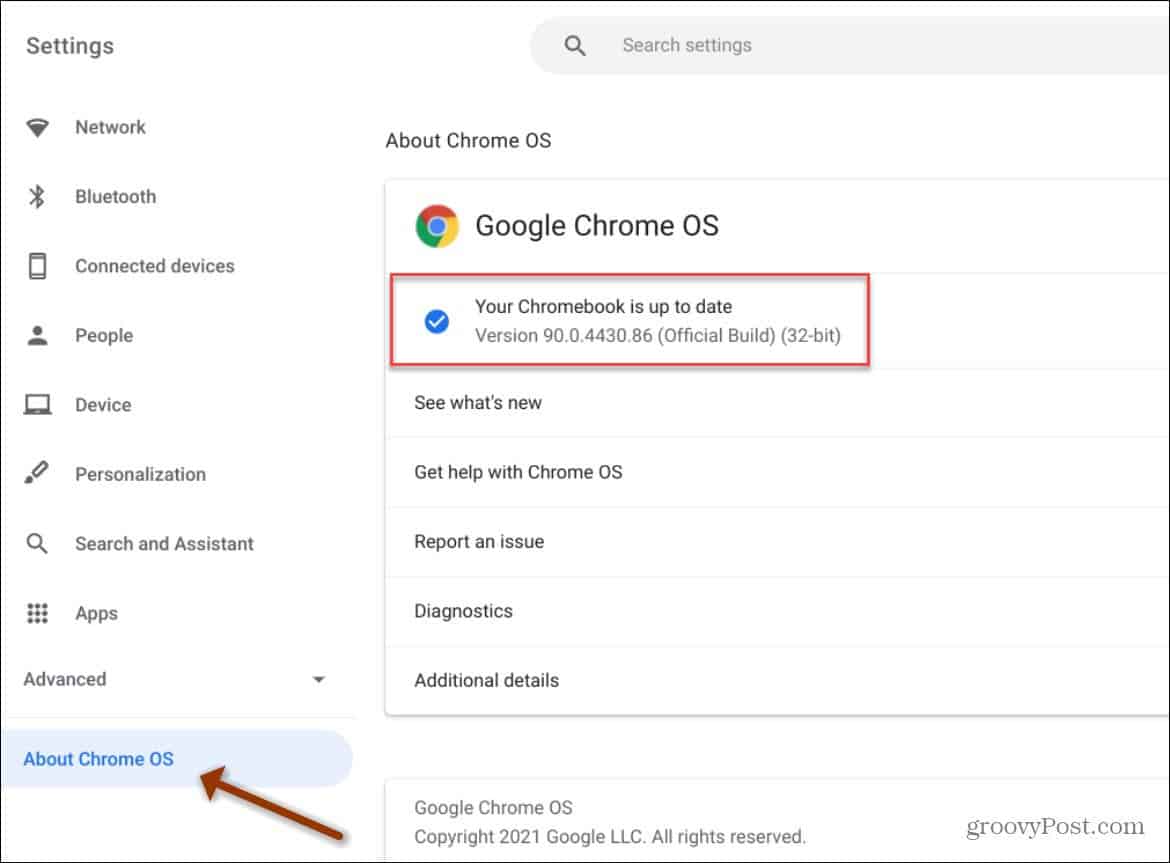
Note: Finding system specs and troubleshooting your Chromebook used to be a convoluted process. But starting with Chrome OS version 90, there is a much nicer Diagnostics tool that you can run to test your device’s hardware. To make sure you’re running the latest version, you can manually update it by going to Settings > About Chrome OS > Check for Updates. Then a restart is typically required to complete the update process.
Run the Diagnostics Tool on Chromebook
To get started, click the circle launcher icon on the left-hand corner of the taskbar. Then type: diagnostics in the search field. Then click the Diagnostics icon that comes up to launch it.
The Diagnostics tool will open up and you can start viewing system information.
Alternately, you can click the clock icon on the right-hand corner of the taskbar. Then click the Settings (gear icon) button to open the “Settings” menu.
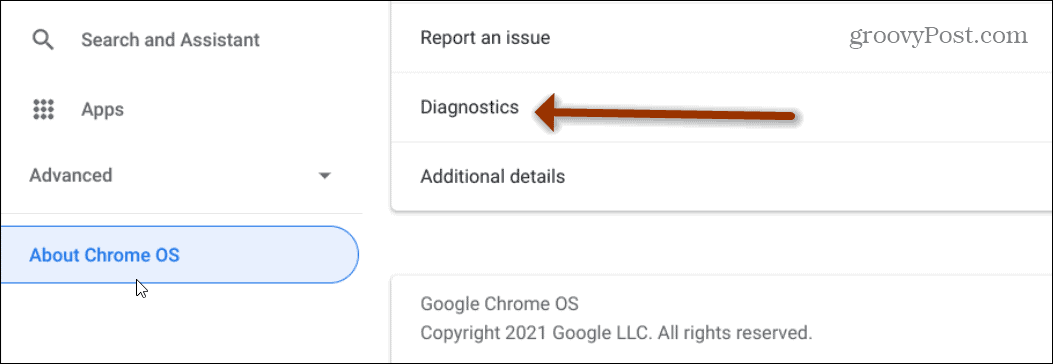
From the Settings page click on About Chrome OS on the left sidebar. Next, click on Diagnostics from the menu that comes up on the right.
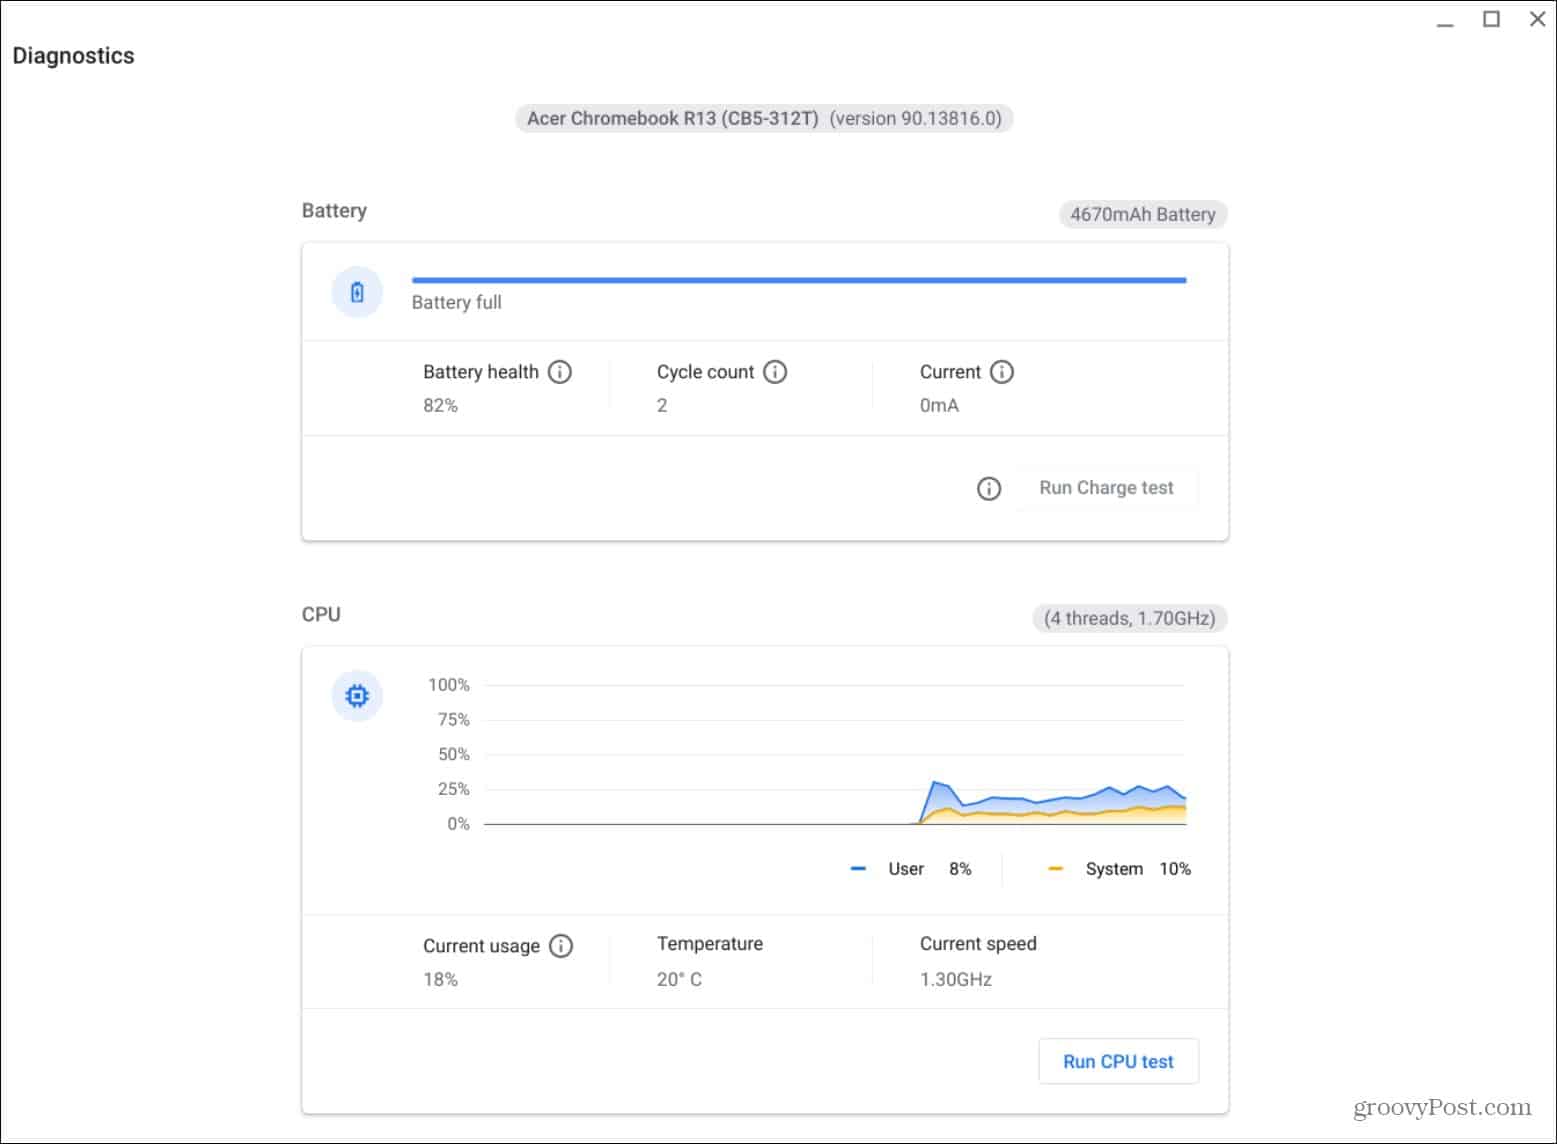
Once you have the Diagnostics tool open, you’ll see it is broken up into three different sections:
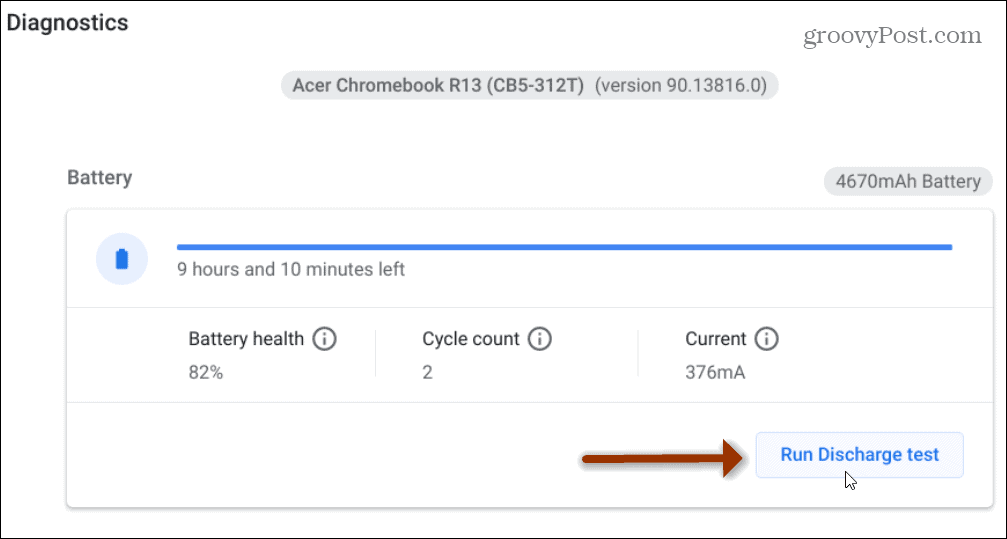
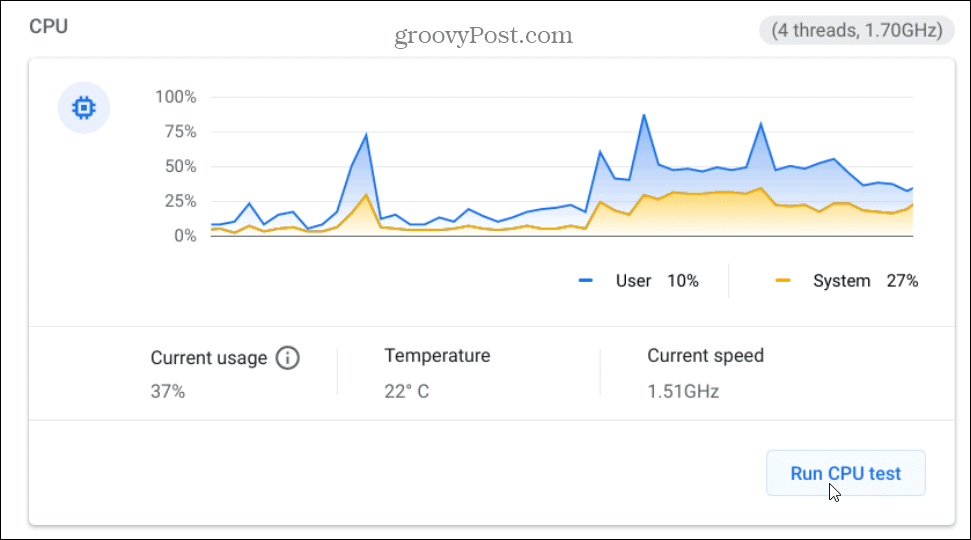
Battery: This displays the size of your Chromebook’s battery and the battery charge level. You can also see Battery health, Cycle count, and Current.CPU: Shows information about your Chromebook’s processor with a real-time graph. It also shows the percentage of how much CPU is being used, the CPU temperature, and the CPU’s speed.Memory: Displays a progress bar that shows how much of the Chromebook’s current memory is being used.
Running Diagnostic Health Tests on Chromebook
The new Diagnostics Tool allows you to run tests on your battery, CPU, and memory. One thing to keep in mind is that a Memory test takes about 15 minutes to complete.
Test Chromebook Battery
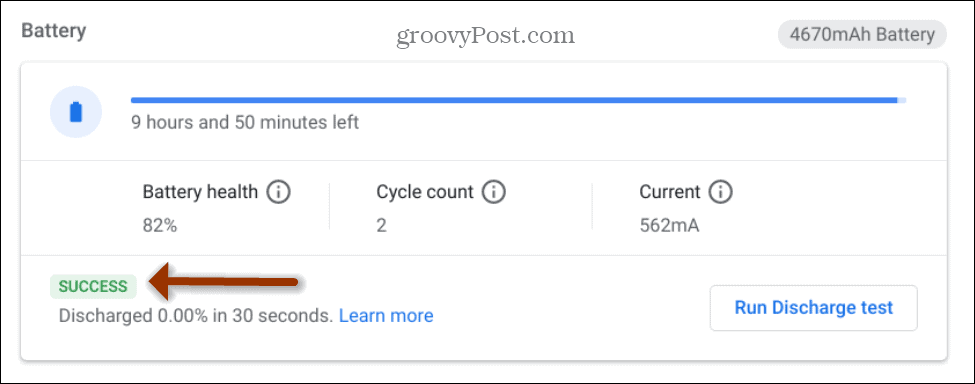
To run a Battery test, click the Run Charge/Discharge Test button in the “Battery” section of the tool. If it is plugged in, you’ll run a “Charge” test. If it is not plugged in, and using the battery, it will run a “Discharge test.” It measures the rate the device is charging or discharging.
After the scan completes you want to see a green “Success” message.
Test Chromebook CPU
To test out the CPU, scroll down a bit and click the Run CPU Test button.
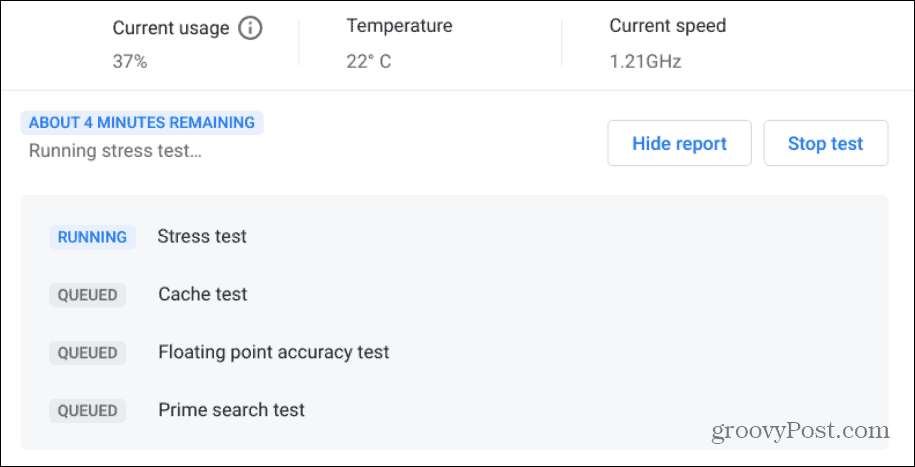
You can monitor the progress while the tests are running.
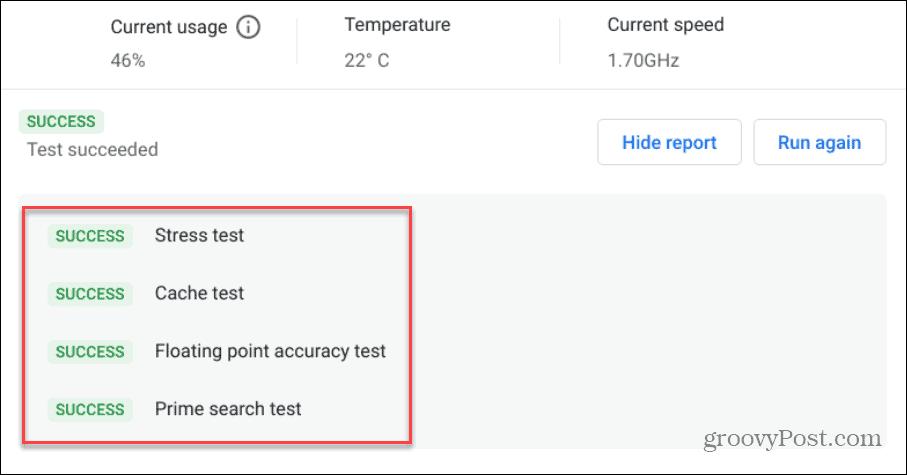
After the test is complete you will see the number of tests that are run like a stress and cache test. If the results are a green “Success” message your device is good to go.
Test Chromebook Memory
If you want to test out the memory on your Chromebook, click the Run Memory Test button. Note that this test can take approximately 15 minutes to complete. So, you’ll probably want to run it and grab a cup of coffee while it completes.
Just like with the CPU and Battery tests, you want to see a green “Success” message when the Memory test is done.
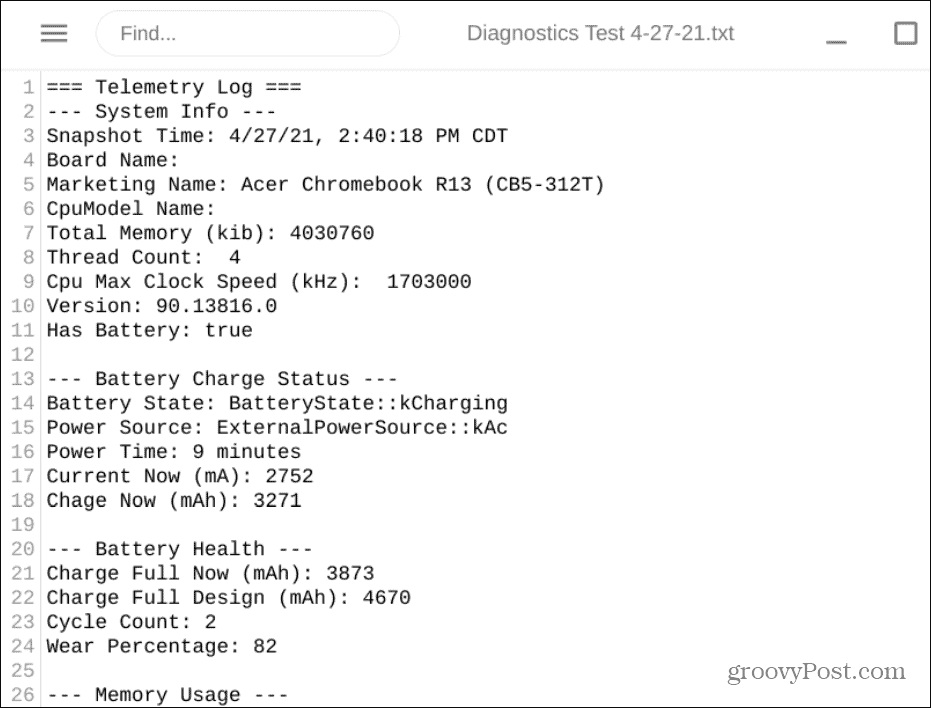
It’s also worth noting that you can click the Save Session Log button at the bottom and save the test results as a text file. That can be handy if you need to send it to your tech support guy or the Chromebook’s manufacturer.
If a test isn’t successful or if you have any additional questions about the Diagnostics tool, check out this Google help page. That’s all there is to it. This new tool makes the process of checking your Chromebook’s hardware much easier. And for more on Chromebooks and Chrome OS check out how to connect a Bluetooth device. Or how to take a screenshot on Chromebook.
![]()
